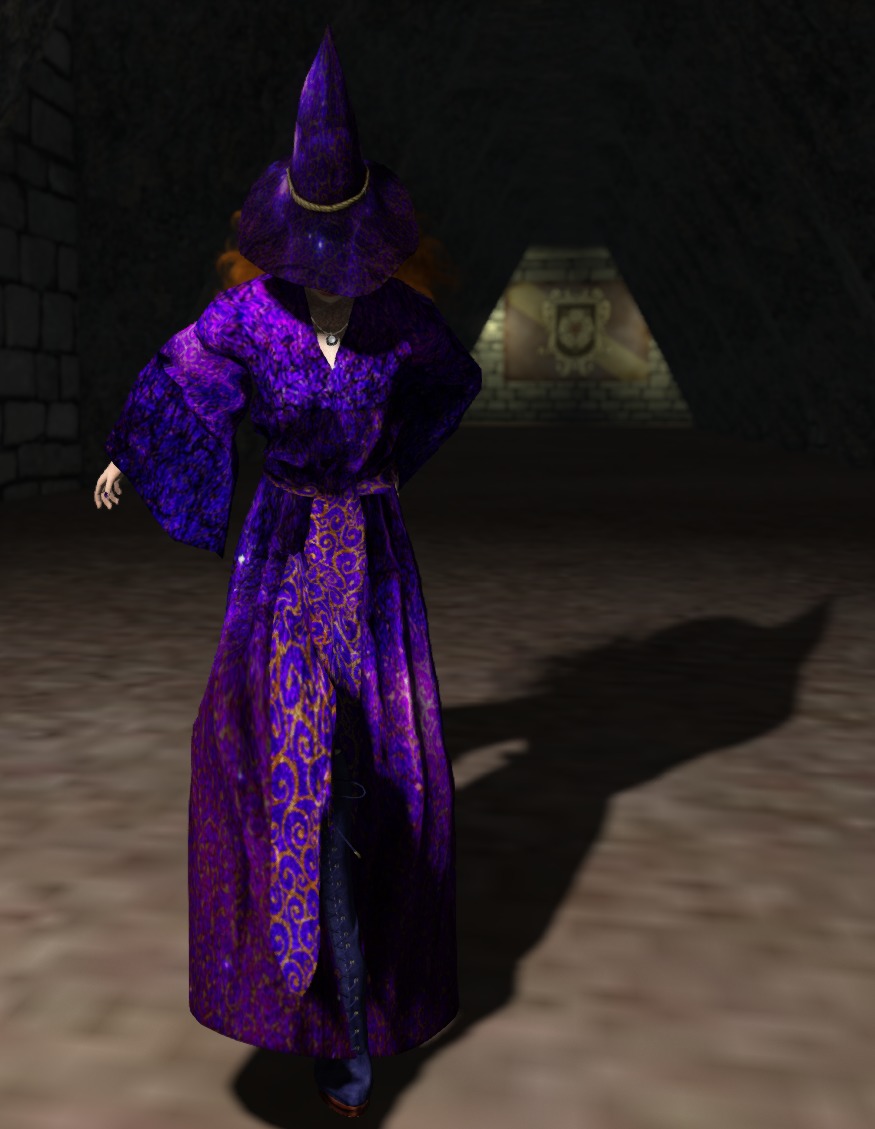
Open Collar

I put up a post a couple of days ago that linked to The Temple of the Collar.  Someone asked me if I used RLV because of the link, and yes, both Aeon and I use the Open Collar scripts, but not in the necklace I was wearing.  Rather, I took the script set and put it in our rings.

As Aeon made our rings, I had to understand how the scripts worked and how make an attachment to place the scripts in. This is a quick tutorial on how to do that with your own objects.

Firstly, you need to obtain the scripts.  They are available at The Temple of the Collar for free.  The object you get is a very plain collar called “OpenCollar Six”, and as you will see, it’s constructed exactly the same as what I will show you below.  Don’t panic!  There are quite a few scripts in there and you will have to use “edit linked” and move them to your inventory.

Next, you need to create a linkset with six prims.  For nearly everything you could wear, five spheres at their smallest size will do just nicely as we are going to make them transparent anyway (at least for the ring.  If you have an attachment with at least six linked parts, , that’s all you need, visible or not).

Here’s a photo with the ring and five sphere’s rezzed beside it…

Each of the spheres needs to be named in the edit window’s general tab.  The names must be exactly right for the scripts to work.

Name the spheres from left to right:

  • Settings
  • Animator
  • Authorizer
  • Dialog
  • RLV

Now, from your inventory, you need to place scripts, notecards, and animations into each of the spheres, and the ring.

Here’s a photo for how each object’s contents should look, starting with the ring, and then followed by the spheres in the same order as above.  Note for the Animator, the contents are not all contained in the photo of the window.  Just drop the notecard and two scripts you can see in the photo, and all the animations from OpenCollar, into this sphere.

I can now link everything together.  Make sure you select the object with all the scripts (the ring, in my case) as the root of the linkset!  Reset the scripts in the object, and if everything has worked ok, you should get a message that says “RLV ready!”

Now you can position the spheres and make them transparent.  I just selected the root object (the ring), copied its position, and pasted the position into each of the linked spheres to position them all with the same center.

And that’s it!  Take the object into your inventory and wear for your personalized RLV enabled attachment!


Butterflies, part 2

Yesterday we talked about a script to add to some cheap copy mod butterflies available on the marketplace to prepare them for use in a rezzer.  Today, we’ll look at the rezzer script and how to put it all together.

Let’s jump in and look at the rezzer script right away.  All we are going to have to do is place this, an optional notecard, and our modified butterflies in a prim, and we’ll be ready to go!  Here’s the script (don’t panic, it’s a little larger than yesterdays!):


integer g_rezzed;
integer g_chan = -88503;
integer g_nc_line;
integer g_rez_count;
integer g_pos_count;
integer g_obj_count;
key g_nc_id;
list g_positions;
list g_objects;
string g_nc_name = "config";

default {
    
    on_rez (integer n) {
        llResetScript ();
    }
    
    changed (integer c) {
        if (c & CHANGED_INVENTORY || c & CHANGED_REGION_START) {
            llResetScript ();
        }
    }
    
    state_entry () {
        llRegionSay (g_chan, "SWAT!");
        integer i;
        g_objects = [];
        g_positions = [];
        g_pos_count = 0;
        string name;
        integer n = llGetInventoryNumber (INVENTORY_OBJECT);
        for (i = 0; i < n; i++) { 
            name = llGetInventoryName (INVENTORY_OBJECT, i);
            if (llGetSubString (name, 0, -2) == "butterflys") {
                g_objects += name;
            }
        }
        g_obj_count = llGetListLength (g_objects);
        if (g_obj_count == 0) {
            llOwnerSay ("There are no butterflys objects in the inventory!");
            return;
        }
        g_rezzed = FALSE;
        g_nc_line = 0;
        if (llGetInventoryType (g_nc_name) == INVENTORY_NOTECARD) {
            g_nc_id = llGetNotecardLine (g_nc_name, g_nc_line);
        } else {
            llSetTimerEvent (30.0);
        }
    }

    dataserver (key id, string data) {
        if (id == g_nc_id) {
            if (data != EOF) {
                if (llGetSubString (data, 0, 0) != "#") {
                    g_positions += (vector)data;
                    llRegionSay (g_chan + g_nc_line, "SWAT!");
                }
                g_nc_id = llGetNotecardLine (g_nc_name, ++g_nc_line);
            } else {
                g_pos_count = llGetListLength (g_positions);
                llSetTimerEvent (30.0);
            }
        }
    }

    timer () {
        vector sun = llGetSunDirection ();
        if (sun.z > 0) {
            if (g_rezzed == FALSE) {
                integer i;
                for (i = 0; i < g_pos_count + 1; i++) {
                    llRezObject (llList2String (g_objects, (integer)llFrand (g_obj_count)),
                                 llGetPos () + <0.0, 0.0, 1.5>,
                                 ZERO_VECTOR,
                                 ZERO_ROTATION,
                                 g_chan + i);
                    g_rez_count++;
                }
                g_rezzed = TRUE;
            }
        } else {
            if (g_rezzed == TRUE) {
                integer i;
                for (i = 0; i < g_pos_count + 1; i++) {
                    llRegionSay (g_chan + i, "SWAT!");
                }
                g_rezzed = FALSE;
            }
        }
    }

    object_rez (key id) {
        if (--g_rez_count > 0) {
            llSay (g_chan + g_rez_count - 1,
                   (string)llList2Vector (g_positions, g_rez_count - 1));
        }
    }
    
    touch_start (integer n) {
        if (g_rezzed == TRUE) {
            integer i;
            for (i = 0; i < g_pos_count + 1; i++) {
                llRegionSay (g_chan + i, "SWAT!");
            }
            g_rezzed = FALSE;
        }
    }
}


OMG you might be saying 🙂 Let’s take it slow, and go through this. I’ll describe each event handler, so hopefully you can grasp what’s going on.

  • on_rez – we are just restarting the script.
  • changed – we restart the script on a region restart so as to make sure we either rez or derez the butterflies.  We also restart if the inventory changes, which makes it easy to add lines to the notecard for additional butterflies .
  • state_entry – we initialize some variables, find the names of the butterfly objects in our inventory (remember, I said yesterday to name the butterfly objects “butterflys1”, “butterflys2”, and “butterflys3”?).  Then we start reading our notecard, which will transfer control to…
  • dataserver – which gets each line in our notecard, and stores the data in a variable called g_positions, and once we hit the end of the notecard, we start a 30 second timer.  We also derez any existing butterfly objects.
  • timer – here’s where all the work gets done.  Every 30 seconds, we check if the sun is up (indicated by the Z value of the sun’s position).  If the sun is up, and we haven’t rezzed any butterflies yet, rez a randomly selected butterfly object from our inventory 1.5 metres above the rezzer for each of the positions in our notecard.  If the sun is not up, say “SWAT!” to each of our rezzed butterflies on the channel they are listening on to delete them.  Note the last parameter of the llRezObject call.  It tells each butterfly object what channel to listen on (the parameter in the on_rez event of yesterday’s script).  Also note that the rez loop rezzes one additional butterfly object and leaves it above the rezzer.   This makes it easy if you just want one butterfly set.
  • object_rez – here we tell each newly rezzed butterfly object the position it should move to.
  • touch_start – just in case you need to reset everything, you can touch the rezzer to delete any existing butterflies.

We need an optional notecard in the rezzer’s contents called “config”.  It consists of lines containing positions in region co-ordinates where you want additional butterflies to be.  You can also comment out a line by putting a hash in the first column.  So you might have something like this:

# butterflies for woods
<104.3, 10.5, 26.0>
# for skybox
<218.5, 132.5, 2026.0>

After all that we better have a picture 🙂

Here’s a screen shot of the rezzer with the config notecard, the above script, and the butterfly objects in its contents:

Here I’ve made the rezzer white so you can see it, but you should set it to 100% transparent, and phantom too.  You also must call the rezzer “Butterfly rezzer”, because that’s what our script from yesterday is expecting.

And that’s it!  If you’ve followed along with the instructions, 30 seconds after you drop the script in the rezzer, your butterflies should rez!  Assuming the sun is up 🙂  Take the rezzer into your inventory and position where you want one set of butterflies to be.  Add lines to the config notecard for additional ones!  Have fun!


Butterflies, part 1

Butterflies don’t fly at night, have you noticed?  Lots of builders just rez some and leave it at that.  Let’s see if we can get some realism.

I’ll wait while you go and buy some butterflies to play with from this marketplace listing.  They’re only L$10…

Got them?  Good.  Once you unbox them you will see they are copy, modify, no transfer.  This is exactly what we want as we can add scripts to them and rez them to our hearts content.

There are three different types in the box, and we are going to rez them one by one, add a script to them, and take them back into our inventory with a different name so we know which ones are ours.

Here’s the script we are going to add to them:

integer g_chan;

default {

    on_rez (integer chan) {
        g_chan = chan;
        llListen (chan, "Butterfly rezzer", NULL_KEY, "");
    }

    listen (integer chan, string name, key id, string msg) {
        if (chan == g_chan) {
            if (msg == "SWAT!") {
                llDie ();
            } else {
                llSetRegionPos ((vector)msg);
            }
        }
    }
}

Let’s examine what this does.  On rez, we get the integer that our rezzer passed us and listen to the rezzer on that channel.  When we receive a message from the rezzer, we delete ourselves if the message is “SWAT!”, else we interpret the message as a position in region co-ordinates and set our position there.  Pretty straightforward, right?

Create a new script in your inventory (probably in the folder you have the butterflies in) and call it something like “Butterfly listener”.  Then, rez each butterfly object, edit it, and drag the script into it.  Editing these can be a little tricky, so use area search to find and edit them.

Here’s a screen shot showing one set of butterflies rezzed with the new script in them.

Name the butterfly objects “butterflys1”, “butterflys2”, and “butterflys3” either while you’re editing them or when you take them back into your inventory.  Note I’ve chosen to keep the creator’s spelling mistake as this makes them easier to find lol.  Note that all lower case is important!  If you don’t name them exactly this, tomorrow’s script won’t work.  You can see them in my inventory window in the above photo.

Tomorrow, we’ll examine the rezzer script, the control notecard, and how to put it all together.  Say tuned!


Lighting

I mentioned in a previous post that I love playing with lights for photography in SL.  I use projector lights nearly exclusively, and in combination with the Windlight settings and the Advanced Lighting Model and a good graphics card, you can get some stunning effects.  I’ve barely scratched the surface of what’s possible, but I thought I’d give you a look at how to get some basic lighting setups going to make your photos more realistic.

If you don’t know how to create a projector light, there’s an article about shadows and setting up projector lights in the Second Life Knowledge Base.  Read it to find out about lots of settings and tricks.

Firstly, Windlight.  I find myself using “Nam’s Optimal Skin and Prim” and “Nam’s Beach Scene” when I want shadows cast from the sun, and “Narcon’s Natural Midnight” when I don’t.  I’ve used some interesting unnatural ones for special effects such as fog, and another for a red sky for a demon shot), but those three are the “go to” ones for natural looking photography in my opinion.

Next, a big secret that no one seems to mention is that you have the option of taking photos using a capture size much larger than your display.  You’ll find the width and height settings in the camera window.  If your video system can handle it and you have the memory in your computer, I recommend you set it to about two to three times larger than your physical display.  This is the same reason that RL photographers use large format cameras: the more detail you capture, the better it will look for scaled down pictures you’ll put on the web.  Also when you (ahem) digitally retouch a huge picture like this and scale it down, your retouches will be better hidden, and you reduce jagged edges too!  What’s not to like, as long as your system can support it?  My display is 1920×1080, and I regularly shoot at 4301×2303 or above.

Finally, if your graphics card can handle it, you should turn up anti-aliasing as far as you can to help eliminate jagged edges.

Note that turning on shadows and high anti-aliasing settings may significantly slow your frame rate, so do all this just before you press the shutter release (I use the new graphics presets for just this purpose).

Let’s look at a scene lit with “Nam’s Optimal Skin and Prim” with the talent (that’s me *grin*) facing into the sun and no shadows.

lights_001

Note that the Advanced Lighting Model is on (you can tell by the bump texture on the floor) but we have shadows set to “None”.  By the way, all these settings I’m mentioning are in the “Graphics->General” tab in Firestorm’s preferences (with the exception of anti-aliasing, which is in “Graphics->Hardware Settings”).

Now, lets look at a lighting setup to get something interesting happening here…

lights_002

Here is a top view of the scene.  The black light on the stand is my main light, and the blue and red cylinder on the right is my fill light.  I’ll talk about settings for both of these at the end.

Lets switch on the main light which is just pure white…

lights_003

As you can see, projector lights are directional, so you have to think about positioning and rotating them to get what you want.  This lights my face and body, but I’m at the edge of the light, so directly to my right (the left of the picture) will be darker, and to my left will be lighter, gradually falling off as we get further away from the light.

For the fill light, I am using a very light yellow that makes my skin look good and makes my hair highlight well.  Lets switch it on; it’s much more subtle than the main light…

lights_004

You can hopefully see the difference on the left side of the photo now.  We’ve considerably lightened it.

Here’s a front view:

lights_005

The fill light is much more noticeable from the front view, and you can see I have it hitting the wall well to the right and filling the left of the picture.

And finally, we can switch on shadows and see were we are.  Note you must switch on “Sun/Moon + Projectors”.

lights_006

Great!  Look at that!  We have three sets of shadows happening, the sun and the two projector lights.  The really heavy shadow is from the sun, the lighter shadow to its right is from our main light, and the faint shadow to the left of the picture is from the fill light.

Note the shadow from the body and stand of the main light to the left of the picture.  This is being caused by the sun.   You have to manage this.  You can do tricks like setting the object to 40% transparent or greater (then it won’t cast shadows at all) or you just reposition your camera or crop the raw image to manage unwanted shadows.  I left that shadow in deliberately so I could mention all that 🙂  Also, if I was shooting this to make it look good, I’d switch to midnight so I’d just have the two shadows from the lights and nothing from the sun.  You can see that effect in the photos I did for this outfit yesterday 🙂

Here are the settings for the two lights.  The main light first (I haven’t bothered showing color as it’s white) and then the fill light.

selection_002selection_001

I tend to use all six of the settings to control the lights (intensity, radius, falloff, field of view, focus, and ambience).  You can see they are very different between the two lights.  Possibly the one that you’ll play with the most is focus.  Negative numbers are soft focus, and positive numbers are sharp.  But play with all of the settings to find out what they do.

And finally, what works in RL works in SL (mostly).  Reading an article about fashion lighting on the web can significantly help you light your scenes better.

Remember, have fun!


Most of this is free

I was talking to someone today about this blog, and they said they loved it, and that Aeon and I are doing a wonderful job, but then they asked me from out of left field “How do you afford all the outfits?”  After getting over my surprise, I told them that most of the outfits you see here are all FREE (or very nearly so).

Of course, both Aeon and I have mesh bodies, feet, hands, and other pieces that cost us actual Linden Dollars, but a lot of the clothing, shoes, hair, and accessories are hunt gifts, Midnight Mania boards, Lucky Letter Boards, and group gifts.  It’s amazing just how much quality clothing you can get for a little bit of time investment plus a little bit of know-how about finding them.

So, I thought I’d do a post on just what to look for.

Hunts

This is a great way to spend some time and practice your camming skills 🙂  Someone will organize a hunt where you search for a specific item.  The organizer may be a single store and the hunt items are hidden about their store; or the organizer may be a professional organization, like Flair For Events, and the hunt items are hidden in a region, or even grid wide!

A lot of hunts are no cost (you buy the hunt item for L$0) and while there are some expensive hunts (where “expensive” may be L$15 an item), it’s rare to see hunts over L$5.

There are a few good websites that track ongoing and upcoming hunts.  Try these two for a start:

Here’s an example of a hunt that’s running now.  You will generally see a poster like this in participating stores:

WOH1 logo

And also, they will generally show you the item that you are looking for.  In this case, it’s a coconut!

HuntObject

Some hunts (including the one above) require that you go and get a HUD and wear it while hunting.  The HUD will give you hints and landmarks to all the hunt locations.  Others will give you a notecard containing landmarks, and others will even have the next landmark included in the hunt item you just found!

Midnight Mania

You’ve all probably seen these boards.  They are also known as “Night Prizes” or “Midnight Madness”.  The basic concept is the store owner will set a target, say 100.  If 100 avatars register for the prize in the 24 hours between one midnight and the next, all 100 avatars receive the prize.

midnight madness_001

Some boards require that you have the store’s group tag active, but a lot are “no group required”.

I watch the group chat for the “Second Life Frees & Offers” group where there are dozens of these announced every day.  If you don’t belong to this group, join now!

There is also a variation of MM boards called “Mini Mania”.  These boards generally have a low target, and when the target is reached (as opposed to at midnight) one avatar wins the prize.

Lucky Letter Boards

These boards usually have older clothing, and the idea here is that if the board shows the first letter of your avatar name (not your display name), you click the board to win the prize.  The letters change on a regular basis, set by the owner of the board, and the times can range from as little as a couple of minutes to hours.

lucky letter_001

Getting a group together for lucky letter boards is a good idea, because each time a prize is claimed, the letter changes.  With a group of people, you can all usually score some prizes for no cash outlay in a very short time.

Again, some boards require you have the store’s tag active.

Group Gifts

A lot of stores reward their group members with free group gifts.  There are a number of stores that are very regular about this and will have one every month (oh my, some people are wonderfully generous, and creative too).

The trick here is to find stores you like the items from, and join the group.  Some of the high quality clothing outfits (such as Ghee) require a one time payment to join the group, but the value here is that usually you can get all the past group gifts once you join.  Joining a quality group for L$250 and getting ten group gifts where the average price for an outfit at the store is L$250 is worth it, let me tell you!

Here’s a screen shot in the Firestorm viewer of a group profile, showing you exactly how to join up to a group.  You can usually find a group join terminal in the store, and clicking it will give you the link to open the group profile.

group join

Clicking on the “Join now!” button will join you up for no cost in this case.

Conclusion

That’s it really!  There are of course other ways to find free items (try going to the SL Marketplace and searching for “dress NOT demo NOT Demo NOT DEMO” and sorting by price low to high).  Use your imagination.  Keep your eyes open.  And most of all, have fun!


It’s a kind of magic

Solas from Blue Moon Enterprises offers a beautiful set of robes (for men and for women) with a wizard’s hat for the Medieval Fantasy Hunt XV!

wizard_c005

The hunt start is here, and there there is a Medieval Fantasy hunt group for discussion.

wizard_c002

The Wizard robe is slink fitmesh.  I had to alpha out arms, but that’s easy, and the result is gorgeous.  Did I mention I love purple?

wizard_c006

Okay, so what about the hat?  Hats are such a royal PITA in SL, but they’re not impossible – and some hats are worth the work.  If you’re comfortable – or willing – to try editing hair, you can make them work.  If you haven’t tried it, here are a few basic ideas for making hats work.

wizard_cHair

  1. Find hair that is small/tight to the head.  Depending on the look you’re going for – the type of hat – this might be sufficient.  I couldn’t get too small of a hair with this, I wanted something long.  Calico‘s ‘Katie 1’  (left) was exactly the style I needed/wanted to flow out from beneath the hat, but you can see in the centre image that the curls up top would not work with the hat. So,  time to edit!
  2. MAKE A COPY OF THE HAIR.  I tell you three times, and what I tell you three times is true: MAKE A COPY OF THE HAIR.  DON’T SKIP THIS STEP.
  3. DID YOU MAKE A COPY OF THE HAIR?
  4. If you’re using this hair for other things, then make sure you now use the copy, not the original.  If you can rename it, do so, otherwise throw this copy into the folder with the hat that you’re going to use it for.
  5. Wear both the hat and the hair, and go into a pose stand.
  6. I wanted to have both my bangs AND the tresses in back.  I resized the hair down as much as I could first — I didn’t need to worry too much about not having enough hair out the back (there was plenty), but I wanted to make sure I had my bangs in front.  So I resized down 10 percent or so, and adjusted the hair forward to make sure that the front looked good.  Now, WITHOUT the hat on, my scalp was showing on top of and in spots on the back of my head – but the hat will cover that well, and leave the hair flowing out from underneath the brim behind.
  7. Here’s where things get complicated.  right-click on the hair, and select ‘edit’ from the circle menu.  There is a little box next to the words ‘edit linked’.  Check this box.  DO NOT UNLINK THE HAIR!  You will need to start all over if you do, and you’ll make a gynormous mess.
  8. Select individual curls on top of the head.  If you can delete them outright, do so – I could not with the calico hair, but I could move them in and down.  That means there are a bunch of curls inside my head, but no one can see them.    This is a lengthy trial-and-error process, depending on the complexity of the hair.  For Katie 1, there are a bunch of static curls to move, plus some flexi pieces.  The flexi pieces aren’t sticking up too much, but be careful with these – these are the top ends of those tresses that we want to keep.  I just slide them down and slightly in until they disappear.  In effect, I’m just trying to drop them down the length of the tress, if that makes any sense.
  9. Back up your cam and look around your head a lot.  Check both sides – when you move a curl from one side in, it may shove out the other side!

And that’s really about it.  When you move around, flexi tresses may flutter beyond the brim – but I’m not too worried about that.  I can forgive a few sins during motion.  I think that it really can be worth the work to get a nice hat to work.

I hope that’s useful.  Good luck!  Oh!  Did I mention?  MAKE A COPY OF YOUR HAIR FIRST!  😀

This is a fantastic hunt, and not to be missed. Head over to the hunt start, and visit Blue Moon!  It is a kind of magic!

wizard_c2009

Mahalo, and aloha!


Tutorial – Making simple stockings

This is a quick lesson on how to make high stockings with one simple texture upload.

First, let’s create a texture.  I needed black stockings for my outfit so we will create a 256×256 pixel transparent image in The Gimp and bucket fill it with black at 40% opacity:

Create a New Image_006Workspace 1_007

Save this as a PNG file and then pay L$10 to upload it into Second Life.

In an appropriately named folder in your Second Life Inventory, create a new set of pants by right clicking in the folder, and selecting “New Clothes” and then “New Pants”.  A system layer pants object will appear which you can rename “Stockings”, and then wear.

Once you are wearing the pants, you need edit them by right clicking them in your inventory and selecting “Edit”, then click on the “Fabric” window, and add the texture we created above, save, and you are done…

Unless you are wearing Slink High feet like me, in which case you can use the same texture in Slink’s Personal Applier HUD to texture your feet correctly.


Getting started in Second Life

or “How to get lots of beautiful clothes without spending any cash”.

Last updated: 4th November, 2020

Rule One: Don’t Accept Objects From Strangers!

Nasty people sometimes put things in objects that will try to mess up your avatar or attempt to take Linden dollars from your account. Just don’t accept objects unless you trust the people giving them to you.  Let’s clarify that a little.  By “objects” I mean just that: objects.  Accepting notecards, gestures, textures (pictures), poses, landmarks, and sounds are not going to harm you.  You need to be wary of objects that you either need to rez or wear.  If they ask the scary question “An object named {the box you just wore/rezzed} owned by {box owner} would like to take Linden dollars (L$) from you”, be especially wary!  If you answer “Yes” to this prompt, the object can take any or all of your L$!

Rule Two: Be Suspicious of External URLs

There are a lot of phishing attempts in group chat (and sometimes in local!) on Second Life.  You need to be especially wary of supposed “marketplace” website links.  If you see a tempting offer in chat that links to marketplace, make sure that it really is marketplace.  Most people in group chats will call “Phishing!” or “Scam!” or “Don’t click!” if it’s a scam, but if they don’t, you still should check that any link that represents to be marketplace really is “https://marketplace.secondlife.com”.

Dressing Rooms

Let’s get started with dressing rooms. You can search for them, but here’s a handy one to get started: Bare Rose, The Fitting Rooms, Women Only.

Dressing rooms are nice private places to unbox clothing and change clothes without getting pestered by gawkers.

Clothes that you get may come packaged up or ready-to-wear.  Ready-to-wear is pretty straightforward; packages may be more complicated. Some things are packaged so that you need to set them on the ground, others are bagged and can be worn to unpackage.

If they need to be set on the ground, simply drag them from your inventory to a piece of ground that you have rez rights for.  This is where dressing rooms come in handy!  Once they’ve rezzed, touch them again to “open”, and copy the contents into your inventory.

Typically, things that are bagged will say “wear to unpack”, and you don’t need rez rights to take care of them. These are VERY useful. 🙂

Always try to make sure that you clean up after yourself, though: if you’ve rezzed something on the ground, when you’re finished please right-click on it, select ‘more’ and then ‘delete’ it. Otherwise, you leave your trash lying around for someone else to take care of 🙁

AOs

AOs are Animation Overriders. They allow you to have a sexy walk, stand, and sit. Or frankly, just allow you to walk/stand/sit more like a regular person than robot-girl. You can go out and pay lots of money for them, but there are some very nice free ones.  Try this one from the marketplace: AX-001-Basically-Girl-AO-Oracul-Animation-HUD, or this one: TuTys-Elite-sexy-female-AO-Free

(Please note, these should cost $0.  If not, just search for the name and sort price low to high and select a $0 one.)

Once you unbox it, “add” it and it will put a little HUD on your screen, generally in the lower right or left. Click the little “power” icon, and you’ll see yourself shift into a more lifelike pose 🙂 There are some cool things you can do with the AOs in the Firestorm viewer that can eliminate the HUD from your screen.

Things to Change in your Preferences

There are a few things you can change in your preferences also associated with your general animation.  The following directions are for the Firestorm viewer, but you should be able to find these settings reasonable easily if you are using the standard SL viewer too.  These are my (Blue’s) personal preferences, so if you don’t like them, feel free to ignore them 🙂

Typing animation

I think the typing animation looks cheesy.  There are times when you may want it one (for example, if you have a pair of cool sock puppets to animate), but most of the time you want it off.  Go to Avatar->Preferences->Chat->Typing and untick “Play typing animation when chatting”.

Head Movement

By default, your avatar’s head follows your mouse movement, your avi’s head (and upper torso) will move to track where the mouse is in your viewer window.  This looks really strange to me.  To disable it in Firestorm, go to Avatar->Preferences->Firestorm and set the two sliders under “Amount that Avatar’s head Follows Mouse” to zero.

Clothing Tip!

You can “wear” or you can “add” most items. “Wear” will remove similar items to put this one on. This is great for changing clothes – you’re already wearing a blouse and want to put a new one on? Just “wear” the new one.

“Add” will put on the new item without removing similar items. You wouldn’t want to do this with a blouse, as you’ll end up wearing two blouses and it won’t be a layered effect that you might be looking for, it will be a mess. BUT if you want to put on multiple pieces of jewelry, for example – a couple different bracelets? ADDing is what you want.

Alphas

Alpha layers are layers that go with certain types of clothes that hide what’s underneath. These keep your skin (for example) from poking through your clothes. ALWAYS ALWAYS ALWAYS “add” alpha layers, do NOT wear them. This is because multiple types of clothes (dress, skirt, shoes, etc.) will use different alphas… and “wearing” an alpha will remove all the other ones. This is an unhappiness 🙂

Group Gifts

Many merchants in SL have mailing lists – “groups” that they use to communicate to their clientèle. They often offer free gifts to the members of their groups.

I frequent a dance club for girls in SL called Eden, which offers its clientèle a freebie shop in the shopping arcade on the top level. This is a fantastic place to get some starter clothes, skins, and hair, all free from Eden.

There are two groups (well, more, but two in particular that I use) that are not merchant groups but instead go and collect lots of information about new and current group gifts. They send out notes every so often about them.  The two that I like best are “SL Frees and Offers” (aka “SLF&O”) and “FabFree” (“FF”). You can search for them using the search utility (“Content -> Search” or ctrl-F), and they’ll be easy to find. You can click on the links and join them.

Those two groups will send you notices and updates about group gifts that you can go out and get for free. These gifts are generally MUCH higher quality than what you typically find in the freebie malls.

Some vendors are pretty good for gifts. I like to recommend DeVicious (currently shut, but I have hope), Scandalize, and Rowena’s Designs. Again, you can search for them with the search utility.

Midnight Mania

You should also be aware of Midnight Mania boards. Many merchants have “Midnight Mania” boards – these are free give-aways that you register for: if they get enough people registering before midnight each day, everyone gets the free gift. 🙂

Hair

For hair – my favourite place for newcomers is Alli & Ali.  They typically have a number of group gifts, and change them fairly frequently. If you go there, you should be able to get a couple, at least.  A&A also has a midnight mania board around back, so make sure that you look for it (use Area Search – see down below).  And yes, Blue is the cover girl for A&A, but that’s not the reason for the recommendation 🙂

More modern hair is made these days, but may be more difficult to come by than A&A hair.  Try Alice Project for their lucky letter boards.

Skins

Skins are probably one of the few things that it’s worth it to go ahead and buy, BUT there are a lot of skins that get advertised in the SLF&O and FabFree giveaways.

BLUSH is generally a pretty good place to start, though. They sometimes have group gift skins available.  Lumae are also very generous with group gift skins.  If you have a single Linden dollar, this skin on marketplace is a good starter.

You can also find some skins/complete avatars in the freebie shop at Eden on the top level of shops near the landing zone (LZ).

Shoes

Shoes can be tough. Your best bet might be to wait and see what kinds of gifts show up on SLF&O or Fab Free. I’m a big fan of Slink feet and shoes, but the feet cost lots of money (L$675). Once you have them, there are lots of nice shoes that you can get for free that get advertised on SLF&O and FabFree. BUT – there are also plenty of shoes that get advertised there that don’t require the special feet, just keep your eyes open.

There is one place that I do recommend as a good starter, though – take a look at Plausible Body. They use an open price system – that is, you can buy shoes (and other clothes) and pay what you think they are worth. I’m not a fan of paying zero… but their pumps are nice to start with, and if you do pay zero, please make sure you go back sometime and give them something, once you have some money.

Also, there are some pretty good non-Slink shoes available on the Market PlacePatulas House is also reputed to have some high feet that are compatible with Slink Highs for only L$25.  I haven’t tried these but have certainly heard that they do the trick to get you going.

Group Tags

You can have an ‘active group tag’ – this shows up above your avatar’s name. You can set your active tag by going to your “People” window and selecting the “Group” tab. Right-click on the appropriate group name, and select “activate”. You’ll see your tag change. Most merchants will require you to have their tag active in order for you to get their gifts.

Viewers

I really like the Firestorm viewer.  I’ve had better luck with it than with the standard Second Life viewer. 🙂

Area Search

You have a utility that can be very helpful – ‘Area Search’.

On the Firestorm viewer it’s under the “World” tab at the top. You can enter in the name of something in the area, and it will give you a beacon to that object’s location. If you go into a store and can’t find the group gift or the midnight mania board, you can search for “gift” or “group” or “midnight”.

Conversations

IM conversations reach across ALL of SL, but are private between the individuals included. “Local” (the tab labelled “nearby chat”) only works inside about 20m… but it broadcasts to EVERYONE inside that 20m. You may have figured that out already. 🙂

Somewhere Called Home

Houses / Sky Boxes / Land
You can have your own area to dress and unpack items. if you are a full Linden account Holder you may already have a Linden home. Some people think they are really good value. You can also rent sky boxes from 20L – 200L per week. Land and other property costs are determined by the area of space and if they have a house on the property and if its furnished, or by the number of prims you can create there.

Good Luck and Have Fun!

That should get you started. I hope that you have a GREAT TIME here in SL!  Remember everyone is here to have fun, enjoy the music, and make new friends.  Try not to be a drama llama 🙂