My Scripting Workflow

Introduction

A while ago, I described my switch to a new scripting workflow. That article explained to my customers why I was re-releasing a lot of my products with no functional change, and that due to my changed workflow, solving bugs they might encounter could be slower than was previously the case.

This article is for my SL scripter colleagues.  It lays out in precise detail just how my scripting workflow works, and includes a functional makefile and bash scripts to implement it.

Required Software

I use Linux (specifically Ubuntu) as my operating system of choice.  You will need the following software installed to implement this workflow.

  • Mercurial
  • GNU Make
  • GCC
  • Firestorm
  • LSL-PyOptimizer
  • Python
  • TortoiseHG (optional)

All my LSL projects are in Mercurial repositories, one repo per project.  Yes, yes, I know that the world seems hellbent on standardizing on Git, but 1) I’ve been using Mercurial forever, and 2) Git is far more complex that it needs to be for a single developer.  If you prefer Git (or some other VCS), feel free to take what follows and replace the hg commands.

LSL-PyOptimizer and the GNU Make utility are also a crucial part of this workflow, as is the Firestorm Preprocessor.

If you’re a scripter and unaware of LSL-PyOptimizer, you’re missing out.  This program, written in Python, takes your LSL as input and spits out LSL that is memory optimized.  Depending on your script, you can save large percentages of your original memory footprint by using this utility.  LSL-PyOptimizer also supports some sorely missed features in the LSL language, which can make coding easier and the end result more readable.  Get it, use it.

One note on LSL-PyOptimizer.  As the package is delivered, the main python script is called main.py, which is not very useful.  I copy main.py to lslpo and include the directory in my path so I can invoke it with a non-generic name.  Additionally, if you are running Python3 (which you should be in this day and age), you need to change the hash bang at the start of the file to remove the trailing “2” from “Python2”.

Python is required to run LSL-PyOptimizer.

GNU Make is a dependency build system.  You write instructions to tell Make how to build your project.  Because LSL-PyOptimizer recognizes most C preprocessor directives, and LSL is C-like syntax, you can use the GCC Preprocessor to automatically build dependencies for you, which Make will then use to build your project.  Make will also be responsible for automatically generating a version number for the resultant code (based on Mercurial tags).

Using Firestorm enables you to use its preprocessor so you can #include files.  The output of LSL-PyOptimizer will be included in its entirety to eliminate the need of copy/pasting from a file on your PC to the edit window in SL.

TortoiseHG is a graphical user interface to Mercurial.  In the following, I will use the Mercurial command line interface, but normally I will use TortoiseHG to manage my repos.

Step by Step

The easiest way to demonstrate this workflow is to work a real example, and additionally it can work as a test to see if you have everything set up correctly.  Let’s create a dead simple project from scratch, assuming nothing exists.


$ cd ~
$ mkdir src           # Standard source directory
$ cd src
$ mkdir include       # Dir containing included scripts
$ mkdir script        # We will place a supporting bash script here
$ mkdir test          # The name of our test project
$ hg init test        # Initialize the project dir as a Mercurial repo
$ cd test
$ mkdir Script        # This is where our original LSL will live
$ mkdir build         # This is where the LSL-PyOptimizer output will end up
$ mkdir stable        # This is where the current release code will end up

This sets up a source directory (/home/username/src/ is the defacto source directory name on Linux, and the makefile assumes that’s where it is). It also sets up a directory to contain included files such as debug.lsl, which I include in every LSL script I write. And finally it creates the basic structure for a project called “test” and initializes it as a Mercurial repository.

To follow along, visit the source for debug.lsl, copy and paste it into ~/src/include/debug.lsl

Now let’s create a basic LSL script in ~/src/test/Script/test.lsl.


#define DEBUG
#include "debug.lsl"

default {

    state_entry () {
        llSetObjectDesc (VERSION);
        llOwnerSay ("State_entry");
        debug ("Done");
    }
}

We initialized the test directory as a Mercurial repository already, so we can just add our new script as a tracked file and commit our changes. If you haven’t set a username for Mercurial, it will complain about that. Just follow its instructions to correct the issue.


$ hg add Script/test.lsl
$ hg commit -m 'Initial version'

And now the makefile. Even though a copy of this needs be in the project directory, they are not project specific, so when you create a new project you can just copy an existing makefile to the new project’s directory. I’ll list it out here and you can copy and paste it into ~/src/test/makefile


BUILD_DIR := ./build
SRC_DIR := Script/
INC_DIR := $${HOME}/src/include/

SRCS := $(shell find $(SRC_DIR) -not -path '*/.*' -name '*.lsl' -printf '%f\n')

OBJS := $(SRCS:.lsl=.olsl)
OBJS := $(OBJS:%=$(BUILD_DIR)/%)
DEPS := $(OBJS:.olsl=.d)

VERSION := $(shell bash $${HOME}/src/script/version.sh)

.PHONY: all
all: $(DEPS) $(OBJS)

$(BUILD_DIR)/%.d: $(SRC_DIR)%.lsl
	@echo "Rebuild" $@
	@mkdir -p $(dir $@)
	@set -e; rm -f $@; \
	cpp -MM -nostdinc -iquote$(INC_DIR) -iquote$(dir $(abspath $@)) $< > $@.$$$$; \
	sed 's,\($*\)\.o[ :]*,$(BUILD_DIR)/\1.olsl $@ : ,g' < $@.$$$$ > $@; \
	rm -f $@.$$$$

include $(DEPS)

$(BUILD_DIR)/%.olsl: $(SRC_DIR)%.lsl version.txt
	@echo "Rebuild" $@
	@mkdir -p $(dir $@)
	@lslpo \
                --preproc=gcpp \
	        --postarg='-DVERSION="$(VERSION)"' \
                --postarg="-nostdinc" \
		--postarg="-iquote$(INC_DIR)" \
		--postarg="-iquote$(dir $(abspath $<))" \
		--timestamp \
		$< -o $@

.PHONY: clean
clean:
	rm -rf $(BUILD_DIR)

STABLE_DIR := ./stable

.PHONY: stable
stable:
	mkdir -p $(STABLE_DIR)
	rm -f $(STABLE_DIR)/*.olsl
	cp $(BUILD_DIR)/*.olsl $(STABLE_DIR)

The makefile executes a bash script to automatically generate a version based on the last Mercurial tag in the repo of the form “VM.m”, which M is the major version and m is the minor version. For example, V1.0.

The script also appends a patch number to the version string if there are committed changes to the working directory after the last tag. For example, if the last tag is “V1.0”, and there are 5 commits after that tag (not including the commit that created/moved the tag), then the generated version will be “V1.0.5”. If there are no tags in the repo, the version number will start at “V0.1”.

Here’s the bash script. Copy and paste this to ~/src/script/version.sh.


#!/bin/bash
if [ ! -f version.txt ]
then
    echo "V0.1" > version.txt
fi
FILE_VERSION=$(<version.txt)
REGEX="re:^(V\d+\.)?(\d)$"
VERSION=$(hg log -r "." --template "{latesttag('$REGEX')}")
CHANGES=$(hg log -r ". and not keyword('added tag')" --template "{changessincelatesttag}")
CHANGES=$(($CHANGES-1))

if [ ${VERSION} == 'null' ]
then
    VERSION="V0.1"
    CHANGES=$(hg log -r "." --template "{rev}")
fi

PLUS=""
if [ $CHANGES -gt 0 ]
then
    PLUS="."$CHANGES
fi

if [ $FILE_VERSION != $VERSION$PLUS ]
then
    echo $VERSION$PLUS > version.txt
fi

echo "$VERSION$PLUS"

With all of this in place, we can finally run the make command to build the project.


$ make
Rebuild build/test.d
Rebuild build/test.olsl
$ ls build/
test.d  test.olsl
$ cat build/test.d
./build/test.olsl build/test.d : Script/test.lsl /home/blue/src/include/debug.lsl
$ cat build/test.olsl
// Generated on 2024-11-17T19:51:03.056390Z
debug(string text)
{
    llOwnerSay(text);
}

default
{
    state_entry()
    {
        llSetObjectDesc("V0.1");
        llOwnerSay("State_entry");
        debug("Done");
    }
}

Note that in the dependency description file test.d, the build targets not only depend on the LSL in the Script directory, but also debug.lsl in our include directory. This means that if we ever change debug.lsl, make will rebuild the project for us.

Also note that because we didn’t add a version tag to the repo, we get the default version of V0.1 in the generated code. Let’s fix that.


$ hg tag V1.0
$ touch Script/test.lsl    # Force make to rebuild even though the code didn't change
$ make
Rebuild build/test.d
Rebuild build/test.olsl
$ cat build/test.olsl
// Generated on 2024-11-17T20:12:33.719787Z
debug(string text)
{
    llOwnerSay(text);
}

default
{
    state_entry()
    {
        llSetObjectDesc("V1.0");
        llOwnerSay("State_entry");
        debug("Done");
    }
}

The makefile has a stable target too. It simply copies the generated LSL currently in the build directory to the stable directory. When I tag a changeset as a release version, I’ll simply run this.


$ make stable
mkdir -p ./stable
rm -f ./stable/*.olsl
cp ./build/*.olsl ./stable
$

Lastly, the repo is a bit of a mess.


$ hg status
? build/test.d
? build/test.olsl
? makefile
? stable/test.olsl
? version.txt

You can choose how to deal with untracked files to suit your style. I use an .hgingore file that contains the following standard lines.


$ cat .hgignore
syntax: glob
.DS_Store
build/**
stable/**
version.txt
makefile

And we should add .hgignore as a tracked file and move our tag to the last changeset (or tag with V1.1 if you prefer).


$ hg add .hgignore
$ hg commit -m 'Track .hgignore'
$ hg tag -f V1.0

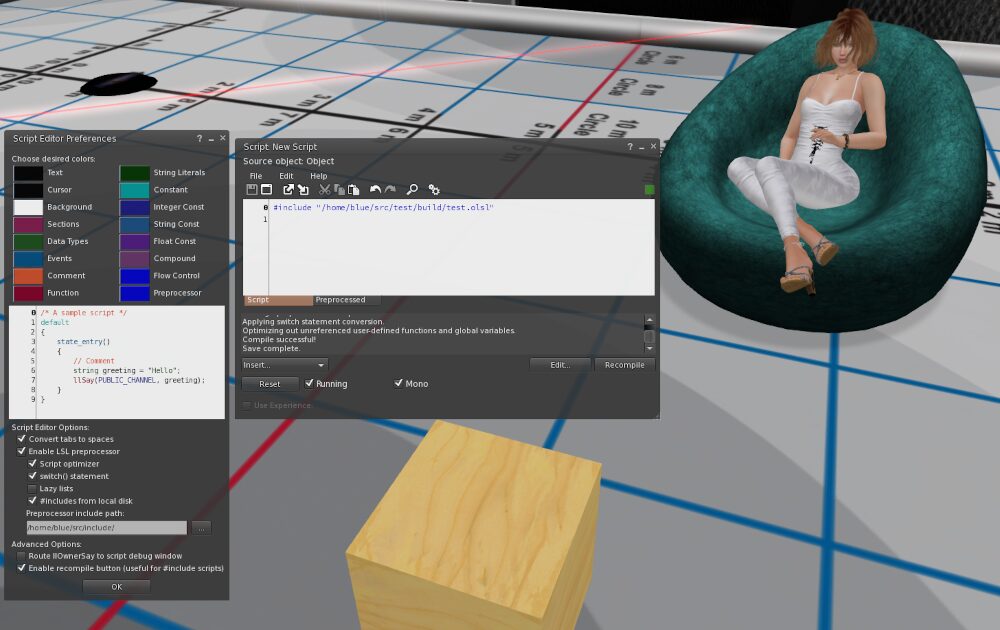
All this work has so far been done on our PC. As I’m developing/testing the script, to get the results in-world, I will create a script in the target object that looks like this.


#include "/home/blue/src/test/build/test.olsl"

Note you need to enable the Firestorm preprocessor in the scripts editor window settings panel to do this.

Once I’m happy with a release and copy the generated code to the stable directory, the production version of the product will have the include path changed from “build” to “stable”.

Conclusion

It can take a little while to get used to editing the script on your PC, issuing the make command, and then switching to SL and hitting the “Recompile” button in the script editor, but it’s worth it.  Everything is tracked, every version is labeled, and you get memory optimized code, and automatic versioning so you never have to guess which version of script is in the twenty different copies of the object you generated while testing 🙂

I hope this helps some of you manage your code better. If you have questions or comments about any of this, feel free to email me or contact me in-world, or leave a comment here on the blog.

Updated Wind Sculpt

I’ve been fiddling around with Linden Scripting Language for over nine years now.  It’s an interesting, quirky language, with a huge number of functions in its library (nearly 500).  While I think I know it pretty well, language and library features can always surprise even the most experienced coder.

A week or so ago, I found myself in the position of wanting to be able to rez and derez 64 linked objects.  Previously, I’ve done this by putting a script in the objects to be deleted that listened to the master script and then deleted themselves when told. But…

64 scripts, even though they were very small (about 5 lines of code and less than 6K of memory each), nearly doubled the land impact of my 65 piece object!  There had to be a better way.  And there is.

There are two functions called llSetRemoteScriptAccessPin() and llRemoteLoadScriptPin() that will allow you to load a script to an object on demand and set it to running.  I won’t give you an example here, you can see some at the links to the functions.  All this is leading up to the fact that I have an existing product on MP that also does rez and derez of multiple linked objects, and uses the old method.  Can we use these functions to drop its land impact?  No prize for a correct guess!

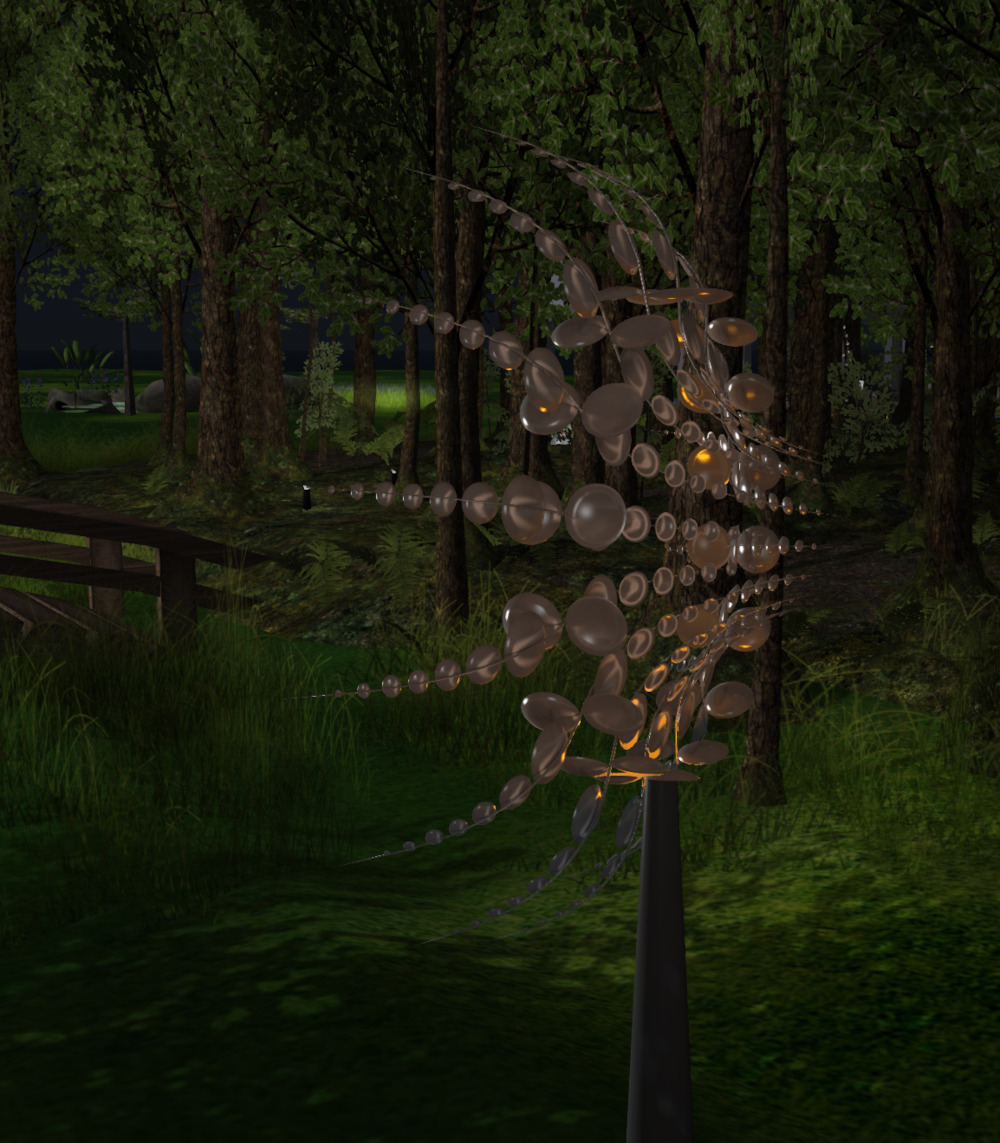
This is the BF Wind Sculpt, a kinetic wind sculpture based on Anthony Howe’s Di-Octo.  It rezzes and derezzes its vanes on demand.  With the old system with a script in each vane listening to the support to say “delete yourself”, the object weighs in at 13 LI.  Using the new method, it comes in at 10.  Yay!  If you own a copy, you should now have version V1.3.


Instantly improve your avatar as a newcomer

Oh my, why oh why do I see three year old and older avatars that still look like they created their account yesterday?  I know it must be laziness or perhaps lack of computer skills, but getting a good looking avatar is pretty simple!

Here, I’ll not only give you a step by step, I’ll assume you’re running Firestorm and give you a step by step to switch off things and switch on things that will instantly improve your look.

Let’s start with that.

Firestorm settings

Head follows mouse

  1. Open Preferences via the main “Avatar” menu, or hit Ctrl-P.
  2. Go to the “Firestorm” tab.
  3. Select the “Avatar” tab.
  4. Set the two sliders at the top to zero by dragging them all the way to the left.  They are labeled “Vertical/Horizontal range that avatar’s head follows mouse”.

Selection Beam

This stops your arm waving wildly around when you select something.

  1. Open Preferences via the main “Avatar” menu, or hit Ctrl-P.
  2. Go to the “Firestorm” tab.
  3. Select the “Avatar” tab.
  4. Untick the “Enable selection beam” checkbox.

Animation Overrider (AO)

This is a bit complex, but follow along step by step if you don’t have an AO.  Although there are a lot of steps, the procedure is straightforward, and uses computer skills and SL skills that you should already by familiar with.

  1. Find a FREE AO on marketplace, we’ll use the Basically Girl AO as an example, and buy it for L$0.
  2. Go to a sandbox, for example, Skybeam, or somewhere you have rez rights.
  3. Open your inventory (Ctrl-I) and locate the object “AX-001 Basically Girl AO”, either via the “Recent” tab if you just bought it, or using the search bar at the top of your inventory window.
  4. Left click on the object in your inventory, and while holding the left mouse button, drag it onto the ground.
  5. Right click the object on the ground and “Open” it, and click the “Copy to inventory” button in the “Object Contents” window that opens.
  6. Close the “Object Contents” window.
  7. Delete the object on the ground with right click and “Delete” (or if you’re using pie menus, right click, “More >”, “Delete”).
  8. You should now have a folder in your inventory called “AX-001 Basically Girl AO” containing an object called “AX-001 Basically Girl AO (Oracul Animations HUD)”.
  9. Left click this object in your inventory, and while holding the left mouse button, drag it to the ground (be careful, the object is small).
  10. Right click the object on the ground and open it, and click the “Copy to inventory” button.
  11. Close the “Object Contents” window.
  12. Delete the object on the ground.
  13. You now should have a folder in your inventory called “AX-001 Basically Girl AO (Oracul Animations HUD)” containing lots of animations and three notecards called “SET01-” followed by a height in centimeters.
  14. If you don’t have a toolbar button labeled “AO” in your toolbar, create it by selecting “Toolbar Buttons” from the main “Avatar” menu, locating the “AO Animation Overrider” button, and dragging it to your toolbar.
  15. Click the AO button on your toolbar to open the “Animation Overrider” window.
  16. Choose one of the notecards, for example, “SET01-155cm” that is closest to your height.  If you don’t know your height, right click your avatar and select “Edit shape”.  The shape editor window will open and your height is in the top right corner.  You may have to click “Metres” to see the metric height.
  17. Left click your chosen notecard and holding the left mouse button down, drag it into the “Animation Overrider” window.
  18. Close the “Animation Overrider” window (and your inventory, you’re done with it) and tick the checkbox in the AO button on the toolbar.
  19. Congratulations!  You now have an AO.  You can disable or enable it with the checkbox on the toolbar button.
  20. You can find other AOs and repeat this procedure to create multiple AO sets in Firestorm.

There’s addition information about the in-built Firestorm AO on the wiki, including links to tutorial videos on how to set it up and customize it.

Fix Bento Idle Animation

Bento is cool, it allows us to move our fingers, and do a lot more facial expressions than before.  But if you don’t have something to play an animation on your Bento bones, some of the default positions can look… weird.  The most common newcomer look is splayed hands.  Do this to ensure that if you have no Bento animations playing, your hands (and face, etc) will run a low priority animation that will fix the weirdness.

  1. Open Preferences via the main “Avatar” menu, or hit Ctrl-P.
  2. Go to the “Firestorm” tab.
  3. Select the “Extras” tab.
  4. Tick the box labeled “Fix Bento Idle Animation”

Typing animation and sound

This should probably be the first thing on the list 🙂

  1. Open Preferences via the main “Avatar” menu, or hit Ctrl-P.
  2. Go to the “Chat” tab.
  3. Select the “Typing” tab.
  4. Untick the box labeled “Play typing animation when chatting”.
  5. Untick the box labeled “Hear typing sound when people type in nearby chat”.
  6. On the left hand panel, select “Sound & Media”.
  7. Select the “UI Sounds 2” tab.
  8. Untick the “Play this sound” checkbox next to “Typing a message”

Appearance

There are certain things, mostly very old objects, available at various freebie places around the grid.  Because they’re free, newcomers tend to snap them up, but to anyone with any time in SL, all they do is mark you as completely inexperienced (and oblivious to appearance).  Once you know what these things are, you can avoid them, or modify them to improve the look of your avatar.

Bling

Bling, which is a particle effect meant to represent sparkly things like jewelry (hence the name), was apparently huge… in 2007.  Today, most people avoid it.  My advice is to chuck things with bling.  If you really like the piece and want to keep it, and it has modify permissions, you can potentially get rid of the bling effect, but to do so requires some basic scripting knowledge.

For help, try going to somewhere like Builder’s Brewery and politely asking an experienced person to help you.  Just remember, the people that you ask may not know how, or may not have time to help.  Thank them and politely ask someone else.  Just don’t be a nuisance to people as they are trying to build.  If you can’t find someone to help you, stash the thing back in your inventory and try another day.

Full bright

Full bright is a texture property.  It’s like switching a backlight on behind a picture.  This is great for lighted signs and stuff, but it looks horrible in hair.  Before mesh hair came along, prim hair was all that was available.  To make it look “better”, some creators allow you to switch full bright on and off by clicking your hair.  If you have “glow in the dark” hair, look for this option, else look for another hairstyle.

There are tons of good mesh hairstyles available for FREE if you take the time to look around.

Avatar expression

Specifically, the HUD that makes you smile every couple of seconds.  I remember finding this as a newcomer and thinking, “Great, my expression won’t be static any more!”.  But, strangely, smiling every couple of seconds comes across to me now as… creepy.  If you must use an expression HUD, try AnyPose Expression HUD, which you can get for FREE.  You can trigger an expression manually, rather than smiling creepily every few seconds.  As a bonus, you get eye position control with this, which is a boon for posed photography.

Mesh eyes

Get some for FREE at Mayfly Mesh Eyes, you’ll be impressed by the difference they make.  Using them requires basic editing skills.

Eyelashes

If your avatar doesn’t have eyelashes, get some prim ones for FREE, for example, these free eyelashes.  Using them requires basic editing skills.

Nails

Back in the day, prim nails were the way to go until you could afford SLink hands, which were the hand replacement of choice until mesh bodies came along with in-built hands.  I still love my SLink hands and wear them every day although I have a Maitreya mesh body.

As the new default avatars still aren’t Bento enabled, you should still be able to find some on marketplace.  And yes, Bows and Butterflies have a number of prim nail sets available for L$1 each.  Again, using them requires basic editing skills.

Makeup

It’s easy to be a blonde in RL and a redhead in SL.  And it’s easy to use your normal makeup tones from RL and look dumb 🙂  If you’re a blonde in RL, and you decide to be a redhead in SL, take the time to research makeup tones that suit redheads, just like you would if you dyed your hair in RL.  For heaven’s sake, try not to wear bright red lipstick with ginger hair, OK?!

Shape

We tend to exaggerate body shapes in SL.  Everyone can be the perfect supermodel, or you can go the other way and exaggerate… other attributes.  You can see what I look like on every other post on this blog.  I’m not a total glamor, and I’m not totally exaggerated either.  Both extremes mark you either as someone in the fashion industry, or a total newcomer.   To look good, I highly recommend you go for a “girl next door” look, with nothing totally over the top (pardon the pun).  You can create your own shape, but you can also find good starter shapes on marketplace for little or no cost.

Before fitted mesh, we had standard sizing.  It’s still a good idea to stick close to one of the standard sizes, as you do tend to come across good clothing for those sizes occasionally.  So, a good starter shape is this one for FREE.  It’s modify so of course you can tweak the sliders to make it your own.

Physics

This is a system attachment that makes your breasts and butt react to gravity in appropriate ways.  Get the Firestorm Team’s Physics pack for free on the marketplace and play around with settings until you get something you like.  To do this, wear a physics attachment from the pack, and right click it in your inventory and edit it.  Then you can adjust the sliders to your liking.  Settings can differ markedly for system bodies and mesh bodies, and you should think about what you’re wearing too.  You don’t want bouncing boobies while you’re wearing a corset, for example, so you should create a few physics objects and wear the appropriate one for the occasion.

Skin

Try lots of demos (in private) while you save up your L$ to buy the best skin you can that has both system layers and at a minimum, Omega appliers for both body and head.  Seriously.

You may be really lucky and find one that has system layers and appliers for free, but it’s really rare.  I think I’ve found one in six years.

Mesh body

For FREE.  Yes, really!  You can get all the details over at Ryan’s blog post.  And now FabFree are maintaining a page listing the current free body and head giveaways around the grid.  So there’s no reason not to have a mesh body!

Clothing

Of course, there is a ton of free clothing available via various means on SL and the marketplace as this blog proves every day.  I’ve written an entire article about how to find free clothing before.  And while this blog today is mostly focused on fitted mesh clothing for the major bodies (because that’s what creators generally put out as group gifts), you can still find standard sizes as I mentioned.  Also, with the introduction of BoM, a lot of system layers have been resurrected, and lots of nice things can be found for FREE to improve your appearance.

Thanks

If you got this far, thanks for reading.  I really enjoyed writing this as it bought back fond memories of when I was first starting out, and the steps I took to gradually improve.  Here’s six years difference (note that full bright hair on the 2014 shot eeps!):

Blue – 2014 vs 2020


Getting started

Do you know we have an article to help newcomers get started in Second Life?  Well, we do!  It was this blog’s first published post.  Even though that’s quite some time ago, we still try and keep the article updated when things change.   To that end, I’ve just reviewed and made some minor revisions to it.

If you run into me in-world, I also have a version of the article as a notecard, so feel free to ask me for it.

Check out the article, and please pass it on to new people that could benefit from it.


Script memory

Thinking about script memory in LSL is very important.  In Mono, which is the modern script engine, each script gets 64K of memory allocated by default.  This is true even if the script uses only a few kilobytes of memory.

With thousands of scripts in a region, this can easily consume all the memory allocated to the region, and cause the region to start swapping memory out to disk (this all happens at the Linden Lab server running the region).  Swapping is a Bad Thing™ and will drastically slow down the sim, which you’ll see as lag.

So, what as script creators can we do?  If you have a script that takes no external input, you can limit the amount of memory your script will be allocated with a llSetMemoryLimit () function call.

Firstly, what do I mean by “takes no external input”?  An example of something that takes external input is something like a picture frame that displays the owner’s selection of textures.  The owner can drag textures into the frame and display them.  Typically to do this, the script will load the names of the textures into a list, and therefore the amount of memory used by the list is out of the control of the script creator.  It depends on how many textures the owner loads into the frame’s contents, and not how the script creator codes the script.

So, if you have something that doesn’t allocate memory out of your control, how do you know what upper limit to set with your call to llSetMemoryLimit ()?  There’s a set of memory profiling calls that will tell you.  And, as you may have guessed, this post was prompted by someone triggering the swapping problem on my home sim, which made me see if I could drop the memory that my scripts allocate.

To make things easy, I created an include file for my scripts.  Let me show you an example of how I use it.  You can access the included files by following the link in the comments next to them.

#define DEBUG
#include "debug.lsl"      // See the source of debug.lsl

#define MEMLIMIT 8000
#define PROFILE
#include "profile.lsl"    // See the source of profile.lsl

#define BLUE "c3623b1f-db83-4003-bb6d-d0d60d32c621"

phantom (integer p) {
    llSetLinkPrimitiveParamsFast (LINK_THIS, [PRIM_PHANTOM, p]);
}

default {
    state_entry () {
        init_profile ();
        llCollisionFilter ("", BLUE, TRUE);
        phantom (FALSE);
    }

    collision_start (integer n) {
        phantom (TRUE);
        llSetTimerEvent (2.0);
    }
    
    timer () {
        llSetTimerEvent (0.0);
        phantom (FALSE);
        show_profile ("timer");
    }
}

This is a simple script that goes in an invisible barrier.  It lets me walk through it by turning the barrier phantom when I collide with it, but for everyone else, it does nothing.  It takes no external input, all the memory it will use is its code, it doesn’t even use any variables!  So this is a perfect candidate for limiting script memory allocation.

The code at the top includes my standard debugging code, and the

#define MEMLIMIT 8000
#define PROFILE
#include "profile.lsl"

defines an initial memory limit of 8000 bytes, tells profile.lsl to enable profiling, and includes the profiling code.

Now notice the calls to init_profile () and show_profile ().  The init_profile () call sets the script’s memory limit based on the MEMLIMIT definition, and starts memory profiling if PROFILE is defined (and, just a warning here, memory profiling can drastically slow down your script so make sure you turn it off when done!)

The show_profile () call displays the current maximum amount of memory the script has used.  It can be tricky to figure out where to put this call, but in this case, it’s easy, as the script flow first sets everything up and then waits for a collision by me, followed by the timer firing.  So the logical place to put the show_profile () call is at the end of the timer.  All the code has run by this stage.

When you save this, and collide with it (if you’re trying this, don’t forget to replace my UUID with yours!), you’ll see something similar to the following…

Barrier: Memory profile init: 0
Barrier: Memory profile show (timer): 7598

This tells us that at the end of the timer event, the most memory the script has ever used is 7598 bytes, so our starting figure of 8000 was close.  If you see

Barrier: MEMLIMIT = 8000 too small

increase the size of MEMLIMIT until this message goes away.

I will leave a little buffer between the size reported and the limit, just in case 🙂  So in my example, I left MEMLIMIT at 8000.  Doing this simple exercise saved over 56K!  That may not sound like a lot, but don’t forget there can be thousands of scripts running in a region, so it adds up.

Once you’ve figured out a good number for MEMLIMIT, don’t forget to turn off debugging and profiling by changing the #define DEBUG and #define PROFILE to #undef DEBUG and #undef PROFILE, and leave the init_profile () and show_profile () calls in place.  The init_profile () call just sets the memory limit when PROFILE is undefined (and the show_profile () call is replaced by a blank line of code).

If every script creator did this, we’d be living much less laggy second lives!


Basic animation chooser

Sometimes, you just need something simple to pick an animation to play.  Here’s a script to do just that.  Rez a prim, drop this script in it, and a bunch of animations, then take and wear it as a HUD.

When you touch it, it will offer you a dialog where you can play any of the animations, or stop the one currently playing.

Note the links to the included scripts.  If you don’t use the Firestorm preprocessor, you can get the source for the #included bits by following the link in the comment next to the #include.  Just cut and paste the code into the top of this script, replacing the #include.

#include "dialog_plus.lsl"  // see the source of dialog_plus.lsl
#include "privchan.lsl"     // see the source of privchan.lsl

integer g_have_perms;
string g_current;
list g_animations;
key g_owner;
integer g_channel;
integer g_listen_handle;
string g_msg = "Select";

default {
    
    attach (key id) {
        if (id != NULL_KEY) {
            llResetScript ();
        } else {
            if (g_have_perms && g_current != "") {
                llStopAnimation (g_current);
            }
        }
    }

    state_entry () {
        integer n = llGetInventoryNumber (INVENTORY_ANIMATION);
        integer i;
        string name;
        g_current = "";
        g_animations = ["Stop"];
        g_have_perms = FALSE;
        g_owner = llGetOwner ();
        g_channel = privchan ();
        for (i = 0; i < n; i++) { 
            name = llGetInventoryName (INVENTORY_ANIMATION, i);
            if (llStringLength (name) > 24) {
                llOwnerSay ("Animation \"" + name + "\" longer than 24 chars, not loaded");
            } else {
                g_animations += name;
            }
        }
        llRequestPermissions (g_owner, PERMISSION_TRIGGER_ANIMATION);
    }
            
    run_time_permissions (integer p) {
        if (p & PERMISSION_TRIGGER_ANIMATION) {
            g_have_perms = TRUE;
        }
    }
    
    touch_start(integer total_number) {
        llListenRemove (g_listen_handle);
        g_listen_handle = llListen (g_channel, "", g_owner, "");
        DialogPlus (g_owner, g_msg, g_animations, g_channel, g_menu_idx = 0);
    }

    listen (integer chan, string name, key id, string data) {
        if (chan == g_channel) {
            if (data == "Back") {
                DialogPlus (g_owner, g_msg, g_animations, g_channel, --g_menu_idx);
            } else if (data == "Next") {
                DialogPlus (g_owner, g_msg, g_animations, g_channel, ++g_menu_idx);
            } else if (data == "Stop") {
                if (g_current != "" && g_have_perms) {
                    llListenRemove (g_listen_handle);
                    llStopAnimation (g_current);
                    g_current = "";
                }
            } else {
                if (g_have_perms) {
                    llListenRemove (g_listen_handle);
                    if (g_current != "") {
                        llStopAnimation (g_current);
                    }
                    g_current = data;
                    llStartAnimation (g_current);
                }
            }
        }
    }
}

Physics lesson

Warning, topless shots below the fold.

Let’s talk boobs.  I see a lot of female avatars getting it sooo wrong in SL.  In RL, we don’t have to worry, we have built-in shapes and physics, and our cleavage is controlled by the clothes we wear, not a texture, so we don’t usually have to think about it (with the exception of picking out that awesome pushup bra for a hot date lol)

In SL, none of this works automatically without some input from us.  We have shapes, physics layers, and skin options to worry about.

A decent quality skin is one of the things you should definitely splash out some money for.  You can get a reasonable skin for a couple hundred Linden Dollars, but a good one will probably set you back over L$800.  Believe me, it’s worth the time and money to find one that you like, as, along with your eyes, it’s the one thing you’ll wear all the time.

When it comes to selecting a skin, pick one with multiple cleavage options.  You want at least small for when you’re bare breasted, medium for when you’re wearing a bra or a bikini top, and “lots” for corsets and some formal gowns.  There’s nothing funnier than seeing an otherwise naked girl wearing a skin with lots of cleavage.  I keep having to ask myself “did she stick them together with superglue, or what?”  lol

Do NOT look like this, there’s someone on that beach (like me) quietly laughing at you!

Much more natural looking 🙂

With Lara by Maitreya, there’s a great option in the HUD to store skins in save slots under the “Skins & Options” tab.  My skin (Adore Peach by Lumae) has four cleavage options, and all of those are stored in the HUD in Firestorm’s “Favorite Wearables” for easy switching without having to dig through my inventory.

Now, you all know we need support, and when that support is taken away, things tend to sag, much as we wish they didn’t 🙂  Before fitmesh clothing, we had standard sizes, and to fit them, many of us saved off a modified shape along with the clothes, and the most modified sliders, at least for me, were breast size and gravity.

Using the same principle, you should have at least a few variations on your base shape for the bare/bra/corset thing with various levels of gravity applied.

And also, when that support is taken away, things tend to jiggle.  This is where physics comes in.  Physics is a system layer that you wear.  Not only can it control breast physics, but also stomach and butt as well.  Basically, the settings tell the viewer how much things should jiggle and which way they should jiggle when you move.

Again, you want at least the three options for bare/bra/corset, with plenty of bounce with little damping for bare breasted, and basically no bounce and high damping for corsets.

You can buy physics packages on the marketplace, but they’re pretty easy to set up yourself.  There’s a page on the Firestorm website with instructions on creating physics layers, so I won’t repeat all the “how-to” here, you can hop over there and read it if you need help.  The Firestorm team also have a free physics collection available on the marketplace which is a great starting point to experiment with all this.

I strongly believe it’s worth the time to set up your avatar so it looks as natural as possible.


Land settings

Woohoo!  You’ve bought yourself some land, or rented a nice parcel with full control on a private sim!  These are the minimal settings I’d recommend you tweak so you get the best experience on your new living or working quarters.

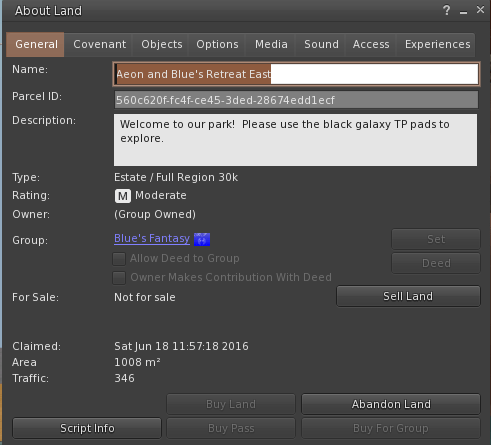
In Firestorm, you can just click the little “Land” button in the top navigation bar to pull up the land settings window while you are standing on your land.  Else you can right click on the land and select “About Land” to do the same thing.

Firstly, just the ascetics bits.  You want people to see a nice name and description for the place, not something like “Parcel #59, 1024sqm, 512 prims” or something that the landlord has set to advertise the parcel.  So change your parcel’s name and description in the General tab.

I recommend that you set your land to group owned too.  This will allow you much finer control on what you and friends can do on your land, and what others can’t.  Even for a privately owned parcels like Aeon and I have here, it’s worth the L$100 group setup fee to do it.  To do this, click on the “Set” button next to “Group”, select the group you want to own the land, and hit the “Deed” button.  There is a full article about group owned land in the knowledge base that you should read before you do this.  And of course having said that, I now probably have to write a post about group roles and permissions 🙂

Next up, and most important, is what people can do on your land.  In the “Options” tab, you should untick “Build” and “Object Entry” for everyone.  If you don’t do this, you’re just leaving yourself at the mercy of griefers.  And unless you’re a combat sim, I’d also suggest you tick “Safe (no damage)” and “No Pushing” too.  Also, that “Use with caution!” line next to “Edit Terrain”?  It’s not a joke.  Make sure it’s unticked unless you are oh, let’s see, a sandbox who wants to teach people about terrain editing? 🙂

Do you want privacy?  In residential areas, mostly you do.  So make sure “Avatars on other parcels can see and chat with avatars on this parcel” is unchecked.

And lastly, everyone needs to get along with their neighbors.  The most irritating thing you can do in my opinion to upset your neighbors is let sounds, be they from gestures, radio, media like TVs playing youtube videos, or voice, bleed into surrounding parcels.

Tick “Restrict gesture and object sounds to this parcel”.  And if you enable voice, “Restrict Voice to this parcel”.  Please, please, please do this, your neighbors will thank you!

This post sprang from a friend of ours who devastatingly had her land reclaimed, was lucky enough to get it back before the landlord returned her objects, and wanted my help to set up again.


Detecting RLV

As you may know, I love scripting.  Last Halloween, I made up some RLV traps to scatter around the build for the unwary.  One was a giant skeletal hand that popped out of the ground and grabbed the unsuspecting victim hehehe.

I though you might be interested to see how the basis of RLV scripting works.  Feel free to skip this article if you have zero script interest 😉

To be affected by these type of scripts, avatars must wear an RLV relay and be using an RLV capable viewer, for example, Firestorm.  The relay acts as a bridge between the scripted object and the avatar’s viewer, receiving commands and then those commands are intercepted by the viewer.  This is how RLV can control your viewer.

The RLV relay listens on a specific channel (you can find heaps of detail about all this in the RLV Relay Protocol document).  The first thing you generally do is find a list of avatars wearing an active relay so you can perform some action on them.  That’s what this example script does, find a list of RLV enabled avatars.

#define DEBUG
#include "debug.lsl"        // See the source of debug.lsl
#define TIMEOUT 1.0         // #define is part of the Firestorm preprocessor
#define CHAN 12345          // You can just define these as normal variables
#define RLVCHAN -1812221819 // if you're not using Firestorm

list g_avis;
key g_target;
integer g_idx;
integer g_handle;
string g_command;

default {
    state_entry () {
        debug ("state default");        
    }

    touch_end (integer n) {
        llOwnerSay ("Checking for active RLVs...");
        g_avis = llGetAgentList (AGENT_LIST_PARCEL, []);
        state rlv;
    }
}

state rlv {
    
    state_entry () {
        if (llGetListLength (g_avis) > 0) {
            g_target = llList2Key (g_avis, 0);
            llListenRemove (g_handle);
            g_handle = llListen (CHAN, "", "", "");
            g_command = "testing";
            llRegionSayTo (g_target, RLVCHAN, 
                           g_command + "," + (string)g_target + ",@versionnum=" +
                           (string)CHAN);
            llSetTimerEvent(TIMEOUT);
        } else {
            llOwnerSay ("--");
            state default;
        }
    }
    
    listen(integer channel, string name, key id, string message) {
        if (llGetOwnerKey (id) != g_target) {
            return;
        }
        if (g_command == "testing") {
            llSetTimerEvent (0.0);
            llListenRemove (g_handle);
            llOwnerSay (llGetDisplayName (g_target));
            g_avis = llDeleteSubList (g_avis, 0, 0);
            state redo_rlv;
        }
    }
    
    timer() {
        llSetTimerEvent (0.0);
        llListenRemove (g_handle);
        g_avis = llDeleteSubList (g_avis, 0, 0);
        state redo_rlv;
    }    
}

state redo_rlv {
    state_entry () {
        state rlv;
    }
}

The basis of this script is the llRegionSayTo () function, the listen, and the timer in the rlv state.  Saying a string to an avatar formatted correctly (in this case, we are asking for the avatar to tell us the version of RLV they are running) will cause the avatar to send us a string back with the information, which is received by the listen.  In the event the avatar does not have a relay on, they won’t respond with anything, so eventually, we remove the listen with a timer.


Script preprocessing

As you may know if you’ve read my “About Blue” page, I love writing scripts to get objects to do things in-world.  It’s one of the reasons I joined SL, to discover what I could do with a new and interesting programming language.  So, you get the occasional technical article on the blog.  Feel free to skip this if you have no interesting in scripting 🙂

LSL is limited is a number of ways.  One of them that it lacks a preprocessor.  Preprocessors allow you to do things like:


#define CONSTANT value

and wherever the word CONSTANT appears in the script, the preprocessor will substitute value before it compiles the resulting code.  This is great for things like debugging scripts, and many other uses.

If you are using Firestorm however, you can switch on a preprocessor for LSL built into the viewer!

Other than doing substitutions such as the example above, there are a number of things you can use defined constants for, such as conditional compilation. Also, the preprocessor implements a number of other functions such as code inclusion.

The feature I want to talk about though is the switch statement.  LSL lacks this common feature of other C and Java-like languages.  So the Firestorm developers included a way to have the preprocessor do it.

In their basic form, switch statements look like:


switch (expression) {
    case value1: {
        do something;
    }
    case value2: {
        do something else;
    }
}

And here is the point.  We know that expression is something that can return an integer.  The first time I used a switch statement in LSL, I coded what any C or Java programmer would and said:


switch (llListFindList (list1, list2)) {

knowing that llListFindList () would return an integer result.  But on looking at the resultant code (you can see this in the preprocessor window in Firestorm after your code is preprocessed), I noted that the switch statement is translated into multiple if statements with jumps, but the preprocessor is not smart enough to evaluate the expression once and use the result!  So if you have 40 case statements, the resulting code will have 40 calls to llListFindList () !  This is terrible for performance!

If you are using switch statements in your LSL, please evaluate your expression before handing it to the preprocessor.  For example:


integer result = llListFindList (list1, list2);
switch (result) {

This will ensure expression is only evaluated once.

You can read more about the Firestorm preprocessor here.