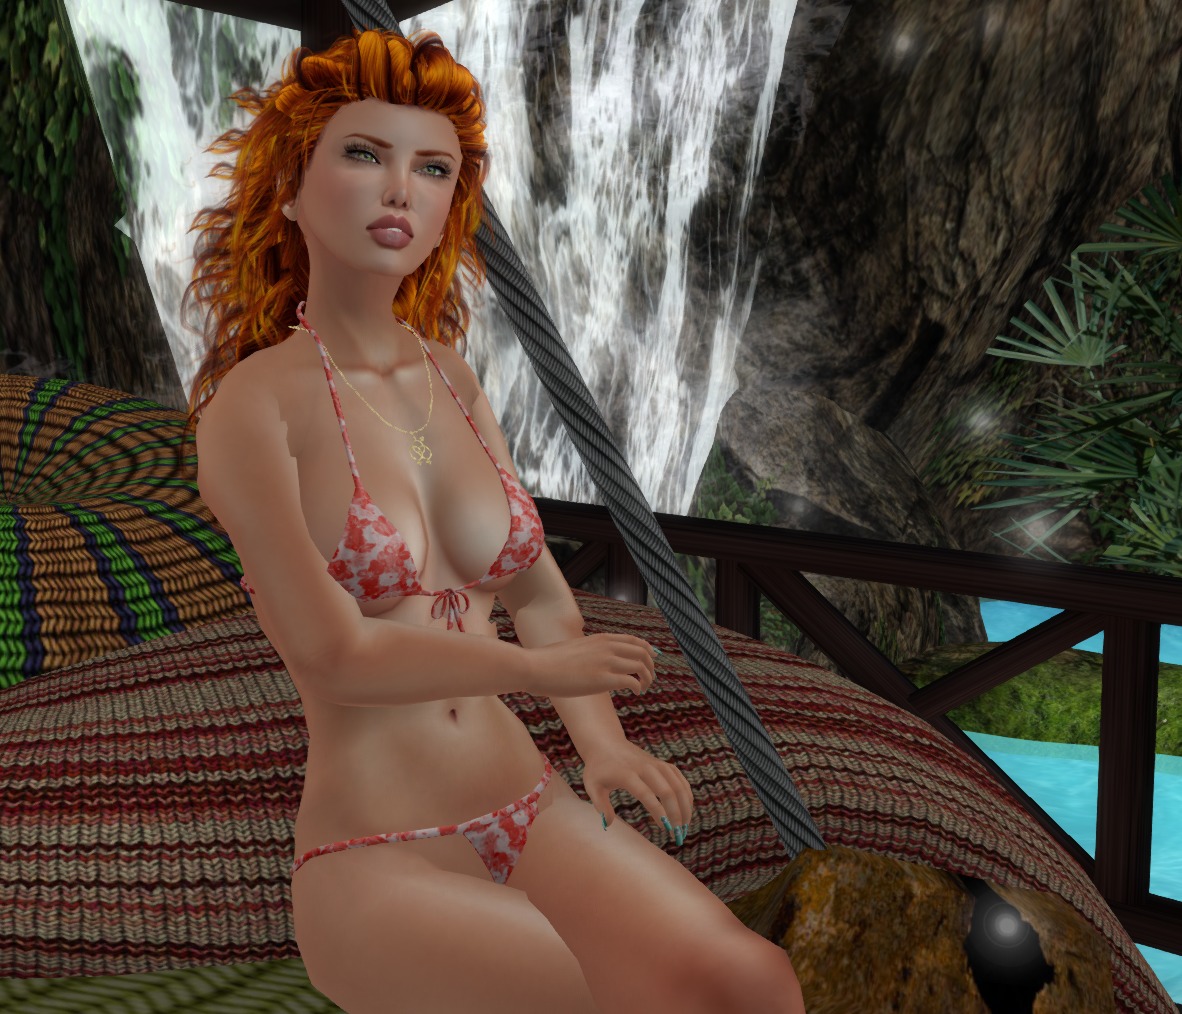
We all know it’s endless summer in SL if we want it to be. Aeon and I like to follow the seasons, and so, before summer ends, here is a quick LotD snapshot in my favorite bikini.
This is a quick lesson on how to make high stockings with one simple texture upload.
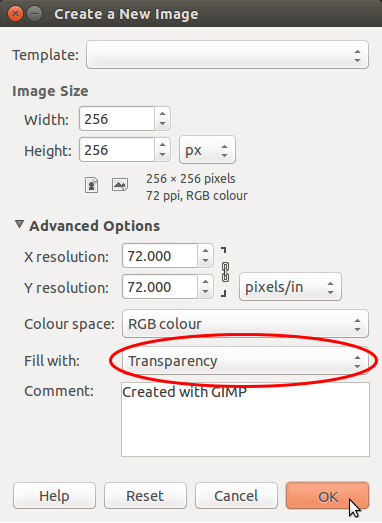
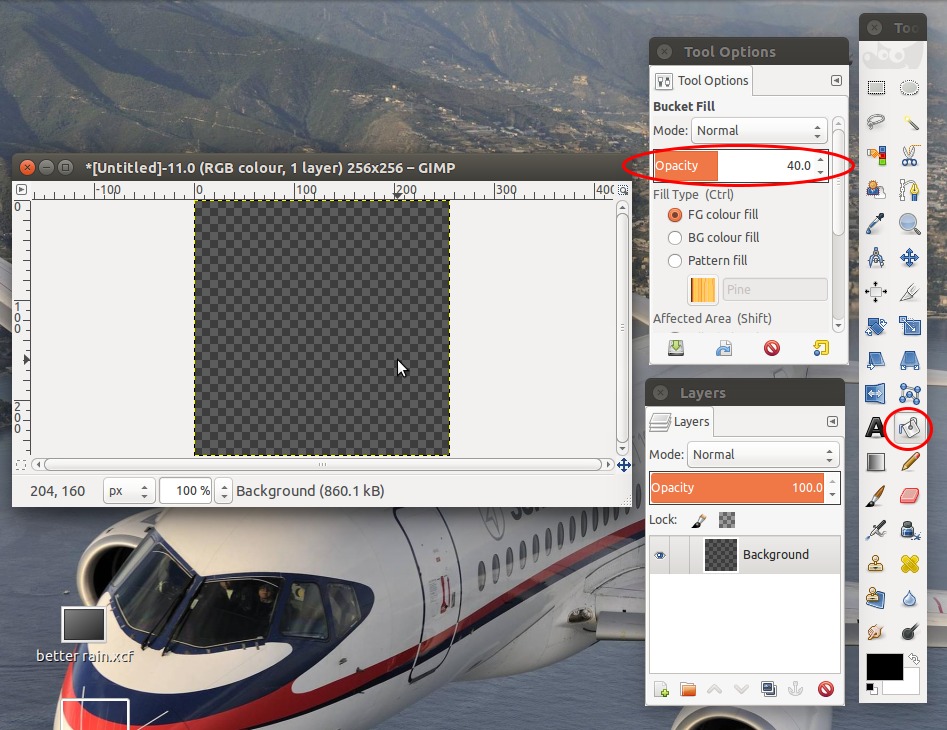
First, let’s create a texture. I needed black stockings for my outfit so we will create a 256×256 pixel transparent image in The Gimp and bucket fill it with black at 40% opacity:
Save this as a PNG file and then pay L$10 to upload it into Second Life.
In an appropriately named folder in your Second Life Inventory, create a new set of pants by right clicking in the folder, and selecting “New Clothes” and then “New Pants”. A system layer pants object will appear which you can rename “Stockings”, and then wear.
Once you are wearing the pants, you need edit them by right clicking them in your inventory and selecting “Edit”, then click on the “Fabric” window, and add the texture we created above, save, and you are done…
Unless you are wearing Slink High feet like me, in which case you can use the same texture in Slink’s Personal Applier HUD to texture your feet correctly.
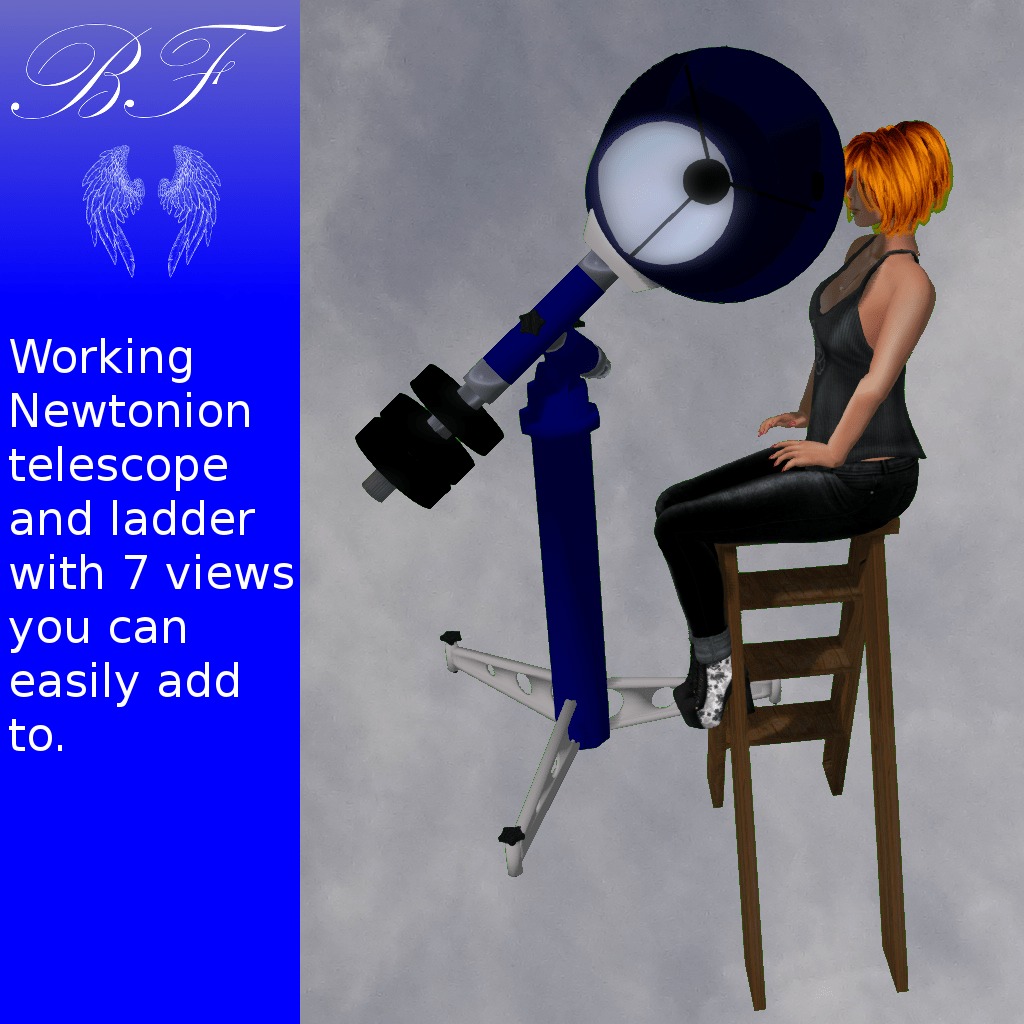
One of the first mesh models I made in Blender was a telescope. I’d previously made a telescope of similar design out of 100% prims, which made for a very expensive object in terms of land impact. I think it was 33 or 34 prims! The mesh one is lots better at 8 LI for the telescope and 1 for the ladder.
The original idea for the telescope was to have an avatar sit on the ladder and their camera POV would be forced to focus on the eyepiece of the telescope, which would then show images of the stars that the owner could load into the telescope. That’s where we are right now, and that the new model is available for purchase on the market place.
As I’ve learned some more capabilities of the system, and done some research on what is available via the internet, an exciting new possibility has presented itself: allow the avatar to jog the telescope across the “sky” via a HUD. The HUD will interact with a completely rewritten eyepiece, which will also allow recentering the image by touching the eyepiece, and adjusting the magnification the image is presented at.
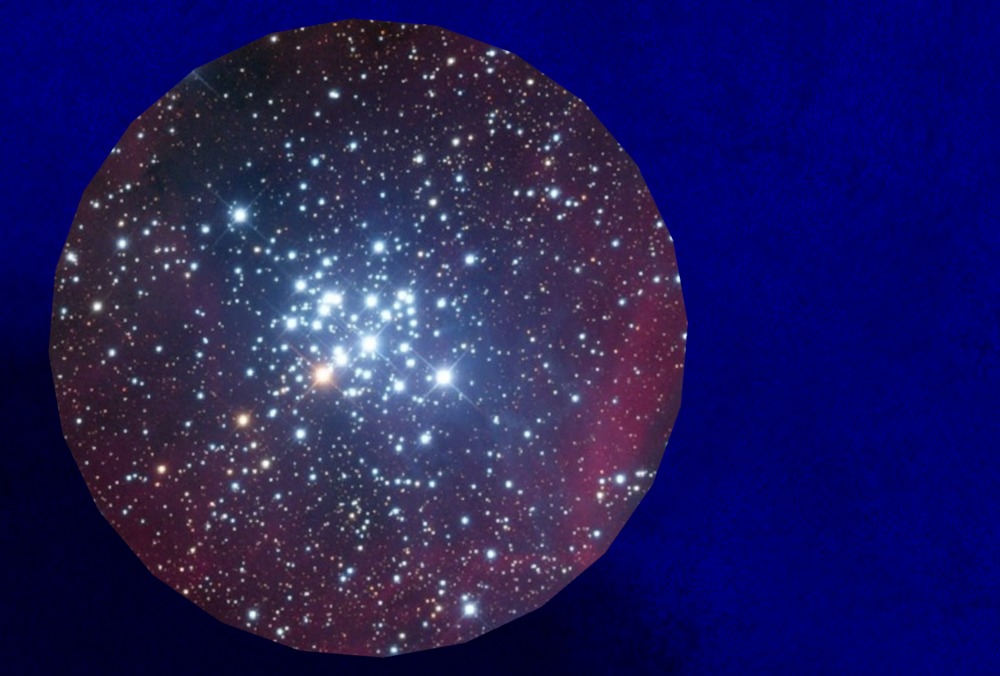
Currently we have this:
With a little luck, shortly we’ll have this:
UPDATE: The new model is now available! See the demo video on the right side of the page!